Welcome to My Blog!

The Adventures begin from here on and now...

Monday 26 December 2011

Cranberry Biscotti


Chocolate Dipped Cranberry Coconut Biscotti

The Christmas Holiday cookie give-away is over, and the Christmas bake goodies are too "passe" now. I decided to make Cranberry Biscotti - a cookie that can be stored and can last for a while and is great for dunking in your favorite coffee or tea.


Ingredients:

1/3 cup butter {1 1/2 stick}
1/2 cup sugar {or more if you want it sweeter}
3 eggs
1 tsp. vanilla extract
1 tsp. flavoured extract
2 tsp. lemon extract
3 cups flour
2 tsp. baking powder
1/4 tsp. salt
1/2 cups cranberries, nuts, raisins {chopped up}


Directions:

Cream butter, and sugar. Beat eggs, add vanilla extract, flavoured extract and lemon zest. Combine 3 cups flour, 2 tsp. baking powder, and 1/4 tsp. salt. Add egg mixture to flour mixture and stir the nut mixture. Divide dough in two and form into logs. Flatten to about 3/4 thickness. Bake at 325 for 25-35 minutes until edges start to brown. {the logs look very thin, but they will rise in the oven}. Try to get the ends as square as possible to reduce the number of malformed pieces. Rest the baked dough 5 minutes, then use a sharp knife to cut it into 1/2 slices. Lay the slices down on the cookie sheet and bake 5-10 minutes on each side. The object of this is just to dry them out, so don't wait for them to brown. The longer you dry them the harder they will be, and the better for tipping in coffee. Allow to cool completely on a wire rack.

*****Class Things Up*****

I made these biscotti to give as a gifts but before I do I like to add a little something extra.
Melt some chocolate in a double boiler. Dip the bottom of each biscotti in the chocolate and set on a parchment lined sheet to cool.
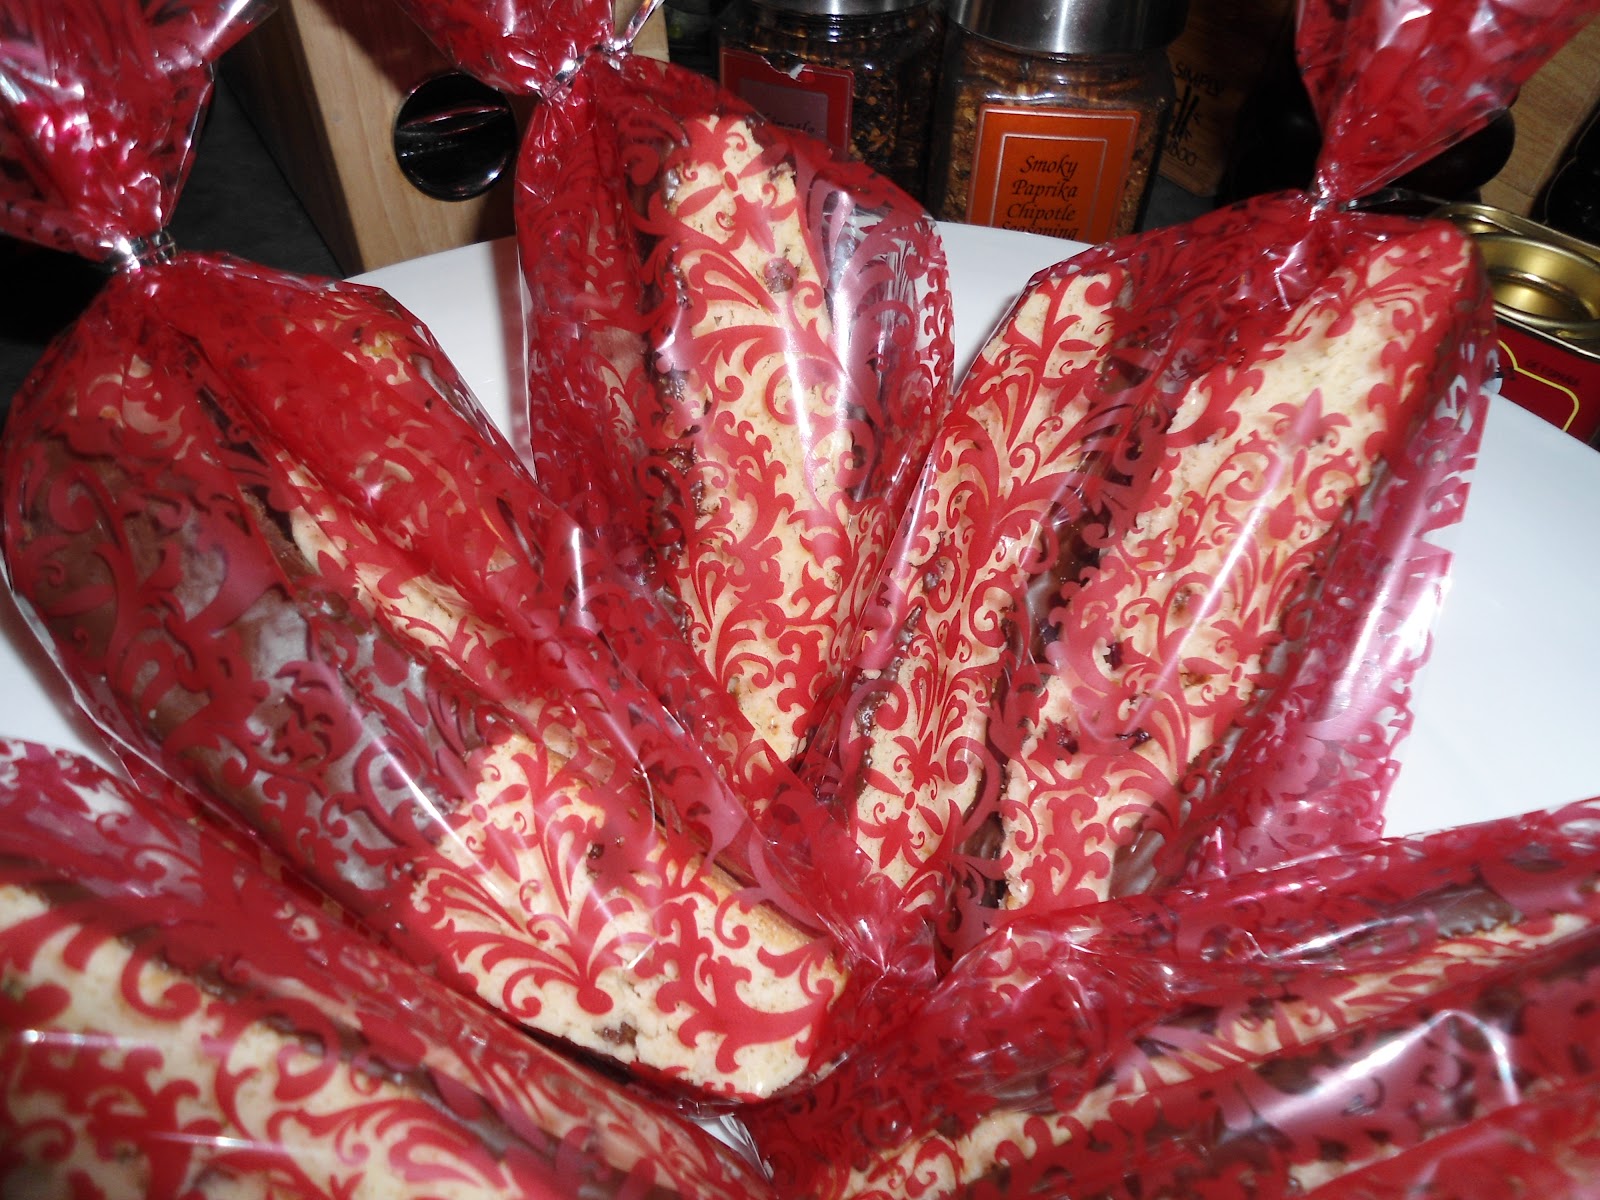
Wrap a dozen or so biscotti in a cellophane bag and label so that the recipient knows to enjoy them with their favorite hot drink.


I used 90% cocoa from Lindt chocolates.{or use whatever chocolate you have on hand}. Do the double boiler method to not burn the melted chocolate.


Yummy!


Let the chocolate completely cool and hardened.{it could take hours*- just leave it overnight on the counter, and the next morning it will be drier and hardened- the better it is for dunking in your coffee or tea}.


Don't these look so cute? I would be too happy to get one!


So deliciously  festive!


Cranberry  Biscotti! These are so easy to make and will really impress your guests.


Tuesday 20 December 2011

No Bake Chocolate Tart


No Bake Chocolate Tart

Double Chocolate Tart- a rich and creamy chocolate tart that's easy to make and worth splurging for...


Ingredients:
Sweet Tart pastry- you can make one or a store bought one. {See recipe below}. 
Tart dough: 1 stick butter
1/3 cup sugar
1/4 tsp. salt
1/4 tsp. vanilla extract
1 eggyolk {room temperature}
1 1/4 cup flour


Chocolate Filling:
1 cup or 6 oz. of good quality chocolate chips {chop if too big}
1 cup heavy cream


Directions:

Sweet Tart Dough- Beat butter and sugar until fluffy. Add vanilla, salt and eggyolk. Add flour and combine until crumbly. Form dough into a ball and refrigerate for an hour or so {dough can be refrigerated for 2 days or freeze it so you have one ready when you need one}.Take out dough when you are ready to use it.{20 minutes prior}. Roll out dough on a floured surface and flatten it out with a floured rolling pin, the size of your  removable pie/tart tray. Pick dough with fork and refrigerate for 10-15 minutes while preheating oven to 350 degrees.Bake dough for 15 minutes or until golden brown. Let  tart crust cool completely. {pat down any bubbles form on the tart}.

Chocolate Filling- Heat cream in a stainless steel and add chopped chocolates halfway through when the cream is almost warm to touch but not scalding hot. Gently stir till combine. Stirring too fast will cause bubbles to form. {I use the double boiler method- warm water on pan and place stainless steel on top, this keeps the cream from a direct heat source and prevents the chocolate from burning}. Make sure not to get any water to your chocolate while melting or it will seize and ruin the chocolate mixture. Pour chocolate mixture into pre-baked tart shell and tap gently to form an even filling. Leave tart to completely cool in the fridge 2-3 hours or more and serve to enjoy!


This is so decadent! Enjoy this with a glass of milk, or whatever drink you have on hand, its so worth it! Top it off with a whipped cream!


You can flavor your filling with anything you fancy- almond, brandy,  or orange liqueur.


I love the crust on this one- its crunchy and has a nuttiness texture. You can use this dough recipe to anything that calls a tart shell.


Mmmmmmmmh. Chocolate tart.


Decadent  Chocolate Tart! This dessert is sure to wipe away the troubles of the day or maybe the week! Enjoy this.


Sunday 18 December 2011

Gnocchi with Carrot Ribbons and Parsley Brown Butter


Gnocchi with Carrot Ribbons and Parsley Brown Butter
I was inspired to do this recipe when a co-worker made this. So I head out and scowered the grocery and found the gnocchi. I didn't think it was hard to find this ingredient but  it was. I found this ingredient in the pasta isle of the grocery store. {You could make your own but hey, the store bought one is easier as long as you get a good quality one- I use the Italian Scarpone brand}. 


Ingredients:

1 pound fresh or frozen gnocchi
1 tbsp. butter
1 small onions or shallots
2-3 carrots {thinly sliced, and peeled like a ribbons}
1 pint cherry tomatoes
salt and pepper to taste
Parsley
Mixed vegetables {optional}


Keep a close eye on these gnocchi. The minute they start floating on top of the boiling water- they're cooked.


 Directions:

Bring water to a boil and cook gnocchi until they float to the surface, about 2-3 minutes or per package directions. Drain and set aside.
On a large skillet melt butter until brown about 2 minutes. Add shallots/onions, garlic and carrots until softened. Add tomatoes, salt and pepper to taste.{add mixed vegetables-optional}. Add parsley and gnocchi and toss to coat. Serve warm. {I like it a day after, the flavors are deepr and tastier}.


*****to make "ribbon-thin" carrots, use a peeler or a mandolin.{use a hand guard when using a mandolin}.


You can use regular tomatoes- just cut them in halves.


Gnocchi {gnoccho-singular}, are soft pillowy dumplings that are either made out of semolina, wheat flour, eggs, potato and cheese. Small gnocchi are called "gnocchetti". They are eaten first as a first course alternative to a soup. 


These smelled so great.


Pillow-soft gnocchi.


Melt in your mouth gnocchi!


Gnocchi with Carrots Ribbons and Parsley Brown Butter! Enjoy your gnocchi!


Monday 12 December 2011

Personalized Cards and Cookie Give-Away


Personalized Cards and Cookie Give-Away

Personalized your cards with your favorite cookies. They are great and truly says a lot about you. You can bake different kinds of cookies you like or favorite cookies of the person you're sending it to. For this one, I  used the Ginger Molasses recipe.{Ginger Molasses Cookies}. This cookie last for 2 weeks, and keeps really well and pretty tasty as I may say so.;). This cookie appeals to everyone and who doesn't want a ginger molasses cookie? 


Personalized your stickers with your message; something short and sweet will do. Wrap cookies with seams down and cover it with your personalized sticker messages. I used a cling wrap to wrap these cookies- I like that you can actually see what your getting, and it looks too pretty to cover up.


These cookies and its presentation look really great and a lot of people really liked it.


They look so cute! You can makes these for birthdays, or party favors as guests leave. Just personalize your messages.


You can also use a mini-favor bag and attach the sticker on the closing seam. You can get clear stickers at your craft stores or use a label sticker. You can use a label maker or print your labels with your message/messages. I like hand writing the messages with my Calligraphy skills. It makes it more special.


Who says you have to spend a lot to give some?


I gave my cards with these cookies. Read your card and eat your cookie too!


My calligraphy pen comes handy at this time of the year. I took drafting classes when I was in high school so my penmanship and hand writing skills are quite impeccable I may add- boasting aside.;).


Personalize your cards with a your favorite cookies! 


Ginger Molasses Cookies


Ginger Molasses Cookies

I always make ginger molasses cookies but during the holidays it's such a treat making these.It just makes the holidays more festive.  The holiday is fast approaching and baking season is about to start to give, and send off to friends and love ones. These cookies keep well and never disappoint. It always hits a spot and makes you eat another one and then another, and next thing, you know you ate half a dozen.....Mmmmmmmh, let me grab another one.....


Ingredients:

1 1/2 cup unsalted butter soften
1 cup brown sugar
1 egg
1/4 molasses
2 cups flour {add 1/4 more if you want it more drier, crispy cookies}
1 tsp. baking soda
1/2 salt {omit this if using salted butter}
1 tsp. cinnamon
1/2 tsp. ground ginger
1/2 tsp. ground clove


Make sure the butter is soften,  and the egg is at room temperature otherwise it will not cream well. Chill the dough for an hour or so and roll on sugar. Keep uncooked  rolled dough in the freezer and you have a dough ready to bake or freeze the rest. I


Directions:

Cream butter, sugar and eggs in a stand mixer until smooth. Stir in molasses. Combine flour, baking soda, salt, cinnamon, clove and ginger powder and blend into the molasses mixture. Chill dough for 1 hour or overnight. Roll dough to desired size and roll on granulated sugar.{Don't make the rolled dough too big as they expand while baking}. I roll the dough and flattened to a 1/4 size cup ring size; this produces a medium sized cookie. Any bigger, you get a large sized cookie. Don't make them too small either as you'll get a flat cookie after baking. Bake at 375 degrees for 8-10 minutes. Leave the cookies on the baking tray for 1-2 minutes to set and cooled a bit and transfer to a cooling rack to completely cool.{Moving the cookies too soon off the oven and straight to the cooling rack will break easily. It needs to set in a few minutes.


See how cute these cookie dough looks.


I shape the dough and rolled them in granulated sugar and just keep them in the fridge and you have ginger molasses cookies ready for baking. 


The secret to these chewy Ginger molasses cookie is by chilling the dough for a few hours or overnight and rolling them to a medium size disc.


I was supposed to make the ginger molasses cookies to these shapes but the cookie will be too big after being baked. I ended up making it in their regular shape.


Ginger Molasses Cookies! These are so foolproof. Crispy on the edges, and chewy in the middle. Perfect cookies all the time.